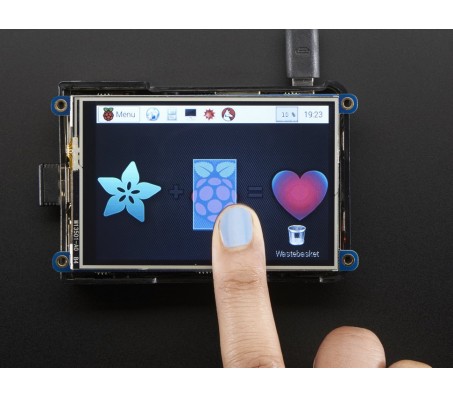
PiTFT Plus 480x320 3.5" TFT+Touchscreen for Raspberry Pi
Description: Is this not the cutest, little display for the Raspberry Pi? It features a 3.5" display with 480x320 16-bit color pixels and a resistive touch overlay just like our popular original, but this one is engineered specifically to work with the newer "2x20 connector" Raspberry Pi's. The plate uses the high speed SPI interface on the Pi and can use the mini display as a console, X window port, displaying images or video etc. Best of all it plugs right in on top!
This PiTFT 3.5" is designed to fit nicely onto the Raspberry Pi Zero, Pi 3, Pi 2 or Model A+ / B+ (any Pi with a 2x20 connector). Not for use with an old Pi 1 with 2x13 connector.
The display uses the hardware SPI pins (SCK, MOSI, MISO, CE0, CE1) as well as GPIO #25 and #24. GPIO #18 can be used to PWM dim the backlight if you like. All other GPIO are unused. There's a 2x13 'classic Pi' connection GPIO header on the bottom, you can connect a 26-pin Pi GPIO cable to it to use any of the other pins as you like. The other GPIO are broken out into solder pads at the bottom, in case you want to use more of the GPIO.
Best of all, it comes fully assembled and ready to plug into your Pi! You can use this as a display for running the X interface, or pygame. You can also have an HDMI display seperately connected. There's four mounting ears that can be used to attach the display & Pi to a bezel, or snap them off with pliers (they're perforated) for a slick exactly-the-same-size-as-a-Pi look.
We've created a custom kernel package based of off Notro's awesome framebuffer work, so you can install it over your existing Raspbian (or derivative) images in just a few commands. Our tutorial shows you how to install the software, as well as calibrate the touchscreen, display images such as from your PiCam and more.
- Display current draw is mostly based on the backlight, with full-on backlight the current draw is ~100mA
- Datasheets, schematic, GitHub PCB files, and the latest kernel fork available in the product tutorial
Kirjoita arvostelu
HUOM: HTML-koodia ei käännetä!
Arvio: Huono Hyvä
Kirjoita kuvassa näkyvä varmistuskoodi:


